Coal & Char

Charcoal Grilling for Beginners: 12 Things to Know Before Your First Cook

The first month on charcoal, in order: what to buy, what to cook first, the mistakes that make people give up, and the three cheap tools that prevent most of them.

By Stephen V.Last updated How we pick

How this is funded:we earn a commission if you buy through our links, at no extra cost to you. It never changes which grill we recommend, and we’ll tell you when we’d skip one. Full disclosure.

Most people who give up on charcoal do it in the first month, and they give up for the same handful of reasons: the fire would not light, then it was too hot, then it was out, the chicken was black outside and pink inside, and the whole thing tasted of lighter fluid. None of those is a charcoal problem. They are all habits, and they are all fixable before your first cook.

This is the beginner page, and it is deliberately not the step-by-step — that is how to use a charcoal grill, which walks you from a cold grill to dinner. This is the twelve things to know before and around that first cook, in the order they will matter, from someone who is an enthusiast rather than a pitmaster and has made every mistake on the list.

1. Buy a kettle, and not the biggest one you can afford

A 22-inch kettle is the easiest charcoal grill in the world to learn on: two vents, a lid that seals, and a fire that does what the vents tell it. It also feeds a family in one round. Resist the barrel with the huge square-inch number; a cheap big grill is a thin-steel barrel that leaks heat and confuses the vents, which is the last thing a beginner needs. Our beginner grill roundup and our sizing guide make the case in full.

2. Never buy lighter fluid

This is the one that decides whether you like charcoal. Lighter fluid is a petroleum product; if any of it is still burning off when the food goes on, the food tastes of it, and beginners always put the food on too early. A chimney starter lights a full grill of coals in about fifteen minutes with a sheet of newspaper or a wax cube, and a basic one costs very little. Buy it with the grill — our lighting guide shows exactly how, and has three fluid-free backups if you are caught without one.

3. Wait for gray ash, every time

Coals are ready when the top layer is covered in gray ash and glowing underneath. Not before. This is the single most-skipped step, and it is the cause of both the “chemical taste” complaint and the “fire was too hot and then went out” complaint: half-lit coals burn unevenly and unpredictably. Fifteen minutes of patience fixes both.

4. Put all the coals on one side

Do not spread them evenly. Bank them on one half of the grate and leave the other half empty. Now you have a hot side for browning and a cool side for cooking through, and every problem with burnt-outside-raw-inside disappears because you can move the food. This is called a two-zone fire and it is the most important technique on this site.

5. Lid on, and the vents are your dial

A charcoal grill has no knob, which throws people. The bottom vent is the knob: open for hotter, half-closed for cooler. The top vent stays mostly open, positioned over the food on the cool side. The lid stays on for nearly everything, because the lid is what makes the vents work. Our temperature guide has a chart of what each setting roughly gives you.

6. Buy a thermometer before a second bag of charcoal

You cannot tell doneness by color or by time, and neither can anyone else. The USDA minimums — 165°F for poultry, 160°F for ground meat, 145°F with a rest for whole cuts of beef and pork — are numbers, and the only way to hit a number is to measure it. An instant-read thermometer is the cheapest thing on this page and the one that changes results most. Our thermometer picks start very cheap, and the live prices are on that page.

7. Cook burgers first, ribs fifth

The first cook should be forgiving and fast. Burgers: eight minutes, one flip, done. Second cook, chicken thighs, which are almost impossible to dry out and teach the two-zone fire properly. Third, corn, which teaches the cool side. Then a whole chicken with the lid on, which teaches you that the grill is an oven. Ribs and anything that takes four hours can wait until holding a temperature feels boring. Our recipe section is written in roughly that order, starting with burgers and thighs.

8. Start on briquettes, not lump

Lump charcoal burns hotter and cleaner and you will probably move to it. But it also burns less predictably, with wildly different piece sizes, and a beginner learning the vents wants a fuel that behaves the same way every time. Standard briquettes are that fuel. Switch once the fire feels routine. Our lump vs briquettes comparison explains the trade; if you want a briquette without the lighting smell, there are natural ones on our natural charcoal page.

9. Stop lifting the lid

Every time you open the lid to check, the heat on the cool side leaves and the fire gets a rush of air. Beginners do this every two minutes. A leave-in thermometer with a grate probe tells you what is happening without opening anything; failing that, set a timer and trust it.

10. Two minutes of cleaning, right after the cook

While the grate is still hot, scrape it. That is the whole routine and it takes two minutes; done cold the next day it takes twenty and does not work as well. Empty the ash once it is completely cold. A cheap grill that is scraped and covered lasts years; one that is not rusts in two seasons. Our cleaning guide has the routine and the twice-a-season deep clean.

11. Shut the vents and keep the coals

When you are done, close both vents and put the lid on. The fire suffocates and the unburnt coals are there for next time — a real saving over the season. Never pour water into the bowl, never tip warm ash into a plastic bin, and give ash a full day before it goes anywhere. Our guide to putting out a charcoal grill covers the safe version in detail.

12. Respect the fire, sensibly

Charcoal is an open fire in a metal bowl. Put the grill on a non-flammable surface, away from the house, railings and overhangs; never indoors or in a garage, because charcoal produces carbon monoxide. Wear gloves that cover the forearm when you pour a chimney, keep children and pets back, and check your building or local rules if you are on a balcony — our safety guide is the full version. None of this is dramatic; it is a set of habits that take a week to become automatic.

What about the health question?

You will hear that charcoal grilling is bad for you. The evidence, summarized by the National Cancer Institute, is about compounds that form in meat at high temperatures and when fat drips onto flames — on any grill, gas included. The two-zone fire in point four is most of the practical answer, because it keeps fat off the flames and lets you cook without charring. We go through the rest in is charcoal grilling bad for you.

Where to go from here

Read the step-by-step walkthrough before the first cook, then keep the temperature chartto hand. When something goes wrong — and something will — our page on a charcoal grill that will not get hot or keeps going out works through the causes in the order to check them. And everything else we have written, buying and cooking, is on the guides index and in one long list on our sitemap.

The three tools that prevent most first-month failures

Not a shopping list — three things. A chimney so you never buy lighter fluid, a thermometer so you never serve raw chicken or dry pork, and gloves so pouring lit coals is routine rather than frightening. Live Amazon prices, dated. The grill itself is chosen on our beginner grill roundup.

Quick picks

Ranked on published specs, beginner-friendliness and value. Select a row to jump to the full write-up. We haven’t cooked on every one of these — here is exactly what we do instead.

#ProductBest forPrice
1
Amazon Basics Charcoal Chimney Starter (6.6 lb capacity)

Amazon Basics Charcoal Chimney Starter (6.6 lb capacity)

There is no technology in a chimney starter — it is a steel tube with a grate across the middle and a handle on the side — so the only sensible way to buy one is to get a full-size body for the least money. This is that. The listing states a 6.6-pound capacity, which is a full 22-inch kettle's worth of briquettes in a single light, and it costs less than the name-brand alternatives that do exactly the same job. If you buy one thing on this page, buy this.

Buy this before the grill
$19.26 · View on Amazon

Price as of September 23, 2026. #ad How we’re funded

2
TempPro TempSwift TP19H Waterproof Instant-Read Thermometer

TempPro TempSwift TP19H Waterproof Instant-Read Thermometer

The cheap instant-read everyone should own, even alongside a leave-in. Touch the probe to the thickest part of the meat and get a fast, accurate reading — the only reliable way to know a burger, chicken or steak has hit a safe temperature. Waterproof, foldaway probe, a few dollars. There's no reason to guess doneness. Listed under TempPro since ThermoPro renamed itself in 2026 — the TP19H model designation and the hardware are unchanged.

Ends the guesswork
$14.99 · View on Amazon

$19.9925% off

Price as of September 23, 2026. #ad How we’re funded

3
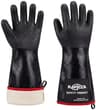
RAPICCA 932°F Heat-Resistant BBQ Gloves (14-inch)

RAPICCA 932°F Heat-Resistant BBQ Gloves (14-inch)

The accessory that pays for itself the first time you dump a hot chimney or move a grate. Long 14-inch cuffs protect your forearms — the part that actually gets burned — and the textured grip handles greasy meat and hot metal without a fistful of paper towels. Cheap, and genuinely part of a safe charcoal kit.

The safety piece
$23.99 · View on Amazon

$35.9933% off

Price as of September 23, 2026. #ad How we’re funded

#1Buy this before the grill

Amazon Basics Charcoal Chimney Starter (6.6 lb capacity)

There is no technology in a chimney starter — it is a steel tube with a grate across the middle and a handle on the side — so the only sensible way to buy one is to get a full-size body for the least money. This is that. The listing states a 6.6-pound capacity, which is a full 22-inch kettle's worth of briquettes in a single light, and it costs less than the name-brand alternatives that do exactly the same job. If you buy one thing on this page, buy this.

What’s good

  • 6.6 lb stated capacity — a full kettle load in one light
  • Lights coals evenly in about 15 minutes with no lighter fluid
  • About as cheap as a full-size chimney gets, and in stock
  • Fits any charcoal grill — nothing to match up or measure

Trade-offs

  • Plain metal handle with no heat shield — a glove is not optional
  • You still need a sheet of paper or a wax cube underneath to light it
  • Galvanized steel discolors quickly; treat a cheap chimney as a consumable
  • A house-brand product rather than a grill maker's, so there is no parts channel behind it
TypeChimney starter (large capacity)
Stated capacity6.6 lb of charcoal
MaterialGalvanized steel
Lights~15 minutes to ashed-over coals

Specs read from the product listing, on September 17, 2026. “Not published” means the maker doesn’t state that figure there.

#2Ends the guesswork

TempPro TempSwift TP19H Waterproof Instant-Read Thermometer

The cheap instant-read everyone should own, even alongside a leave-in. Touch the probe to the thickest part of the meat and get a fast, accurate reading — the only reliable way to know a burger, chicken or steak has hit a safe temperature. Waterproof, foldaway probe, a few dollars. There's no reason to guess doneness. Listed under TempPro since ThermoPro renamed itself in 2026 — the TP19H model designation and the hardware are unchanged.

What’s good

  • Fast, accurate reading for the all-important doneness check
  • Waterproof body wipes clean and survives grill spills
  • Cheap enough to be a stocking-filler

Trade-offs

  • You must be at the grill to use it — no remote monitoring
  • Single probe, manual reading only
TypeInstant-read (spot check)
Probes1 (foldaway)
WaterproofYes (per listing)
App / WiFiNo

Specs read from the product listing, on September 2, 2026. “Not published” means the maker doesn’t state that figure there.

#3The safety piece

RAPICCA 932°F Heat-Resistant BBQ Gloves (14-inch)

The accessory that pays for itself the first time you dump a hot chimney or move a grate. Long 14-inch cuffs protect your forearms — the part that actually gets burned — and the textured grip handles greasy meat and hot metal without a fistful of paper towels. Cheap, and genuinely part of a safe charcoal kit.

What’s good

  • Long cuffs protect your forearms, not just your hands
  • Rated to high heat and grippy on wet, greasy food
  • Cheap and hard-wearing

Trade-offs

  • Not for holding your hand in live coals for long periods
  • Bulkier than bare hands for fine tasks
MaterialNeoprene-coated, cotton-lined
Stated heat ratingUp to 932°F (per listing)
Length14 in (forearm coverage)
Best forChimneys, grates and hot coals

Specs read from the product listing, on July 21, 2026. “Not published” means the maker doesn’t state that figure there.

A note on food safety. Temperatures on this page follow USDA safe-minimum guidance. Always confirm doneness with a food thermometer, not by time or color. We’re enthusiasts sharing what we’ve researched, not professional pitmasters — when in doubt on safety, follow the USDA.

Frequently asked questions

What is the best way to start charcoal grilling as a beginner?

Buy a 22-inch kettle, a chimney starter and an instant-read thermometer, skip lighter fluid entirely, and cook burgers for your first meal. Light a chimney, wait for gray ash, bank the coals on one side, and cook with the lid on. Everything else is refinement of those five habits.

What should a beginner cook first on a charcoal grill?

Burgers, then chicken thighs, then corn. Burgers are fast and forgiving; thighs teach the two-zone fire and are hard to dry out; corn teaches you the cool side. Leave ribs, brisket and whole birds until the fourth or fifth cook, once holding a temperature feels normal.

How long does charcoal take to be ready?

About fifteen minutes in a chimney starter, and the signal is visual: the top coals are covered in gray ash and glowing underneath. Food that goes on before that point cooks over an unstable fire and picks up the lighting smell of whatever fuel you used.

Should the lid be on or off when grilling with charcoal?

On, for almost everything. The lid turns the grill into an oven and lets the vents control the fire. Off is for the last minute of a sear or for flipping. Beginners lift the lid to look and lose the heat every time; a thermometer with a grate probe removes the reason to.

Do beginners need lighter fluid?

No, and it is the single most common reason people decide they hate charcoal. A chimney starter lights a full grill of coals in fifteen minutes with a sheet of newspaper or a wax cube, evenly and with no chemical taste. If you already own fluid, our lighting guide has three fluid-free methods that do not even need a chimney.

How do I know when meat is done on a charcoal grill?

With a thermometer in the thickest part, not by time or color. The USDA minimums are 165°F for poultry, 160°F for ground meat, and 145°F with a three-minute rest for whole cuts of beef and pork. A basic instant-read thermometer is cheap, and it is the tool that makes the biggest difference to a beginner's results.

Sources

Keep reading