The premise of this whole site is that a cheap charcoal grill cooks as well as an expensive one if you run it properly. This page is the practical version of that claim: the specific, inexpensive things you can add to a budget cooker that change how it behaves, ranked by how much difference they actually make.
One principle sits above all of them. Upgrade the fire, not the furniture. Almost everything sold as a grill accessory improves comfort or looks. The short list below improves the fire — how well you can see it, shape it, contain it and flavor it — and that is what shows up in the food.
1. A thermometer (the biggest change for the least money)
Cheap grills either have no thermometer or have a lid dial that reads the air at the top of the dome — which is not where your food is, and on a budget grill is frequently not accurate either.
A probe at grate level tells you what the cooking environment actually is. A probe in the meat tells you when to stop. Together they turn “I think it’s about right” into a number, and the USDA is unambiguous that a thermometer is the only reliable way to know food has reached a safe temperature.
Start with an instant-read: cheap, instant, and it fixes the most common failure (food undercooked or dried out). Add a leave-in dual probe when you start doing longer cooks, so you can watch the pit without opening the lid — which matters most in cold weather.
2. Charcoal baskets (or a foil wall, for free)
A two-zone fire is the single most useful thing you can do on any charcoal grill: hot on one side, empty on the other, food moved between them. The problem on a bare grate is that the fire does not stay where you put it — as briquettes burn down the pile slumps and coals roll into the cool side, and an hour later you no longer have one.
Baskets hold the geometry, and they lift the fuel off its own ash so a small fire keeps burning hot. On a 22-inch kettle they cost about what a bag of briquettes costs.
The free version: fold heavy-duty foil into a four-layer strip, stand it on edge across the charcoal grate and bank the coals against it. It lasts one cook. Two fire bricks on edge do the same job permanently for a couple of dollars, and they add heat mass while they are at it.
3. Gasket tape, if your lid leaks
This is the upgrade almost nobody makes and the one that transforms cheap barrels, budget offsets and thin vertical smokers.
Those cookers have a flat-ish lid sitting on a flat-ish rim, and they leak air everywhere. Every leak is an intake you did not choose, so closing the vents does not slow the fire the way it should, fuel burns faster, and holding a low temperature becomes an argument rather than a setting.
High-temperature self-adhesive fiberglass gasket tape — sold for wood-stove doors — run around the lid lip and any firebox joint closes most of it. An hour’s work and very little money. It is the first thing we would do to a combo barrel or a budget vertical smoker, before the first cook rather than after the first disappointment.
Kettles do not need it. The rolled rim and domed lid already seal well enough that the vents genuinely control the fire, which is the underrated reason kettles punch above their price.
4. Wood chunks (flavor for pennies)
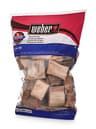
The cheapest flavor upgrade in charcoal cooking, and the one most people skip because they assume smoke requires a smoker. It does not: two fist-sized chunks of hardwood buried in the coals turn an ordinary kettle cook into something noticeably different.
Chunks, not chips. Chips burn out in minutes and need constant replacing; chunks smolder for the length of a cook. And do not soak them — wet wood steams first and smokes later, which is not an improvement. Our smoking fuel guide covers which woods suit which food.
A bag of chunks costs less than a decent bag of charcoal and lasts a season. Per dollar of flavor, nothing else on this page comes close.
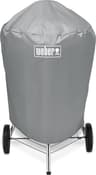
5. A cover (the one that decides how long the grill lives)
Not a cooking upgrade at all — a lifespan upgrade, and mathematically the best value here. Rain collects in an uncovered bowl, sits under wet ash and rusts the grill from the inside out. On a cheap painted grill that process takes a couple of seasons.
A correctly-sized cover costs a fraction of the grill and roughly doubles its life. Sizing matters more than price — the details are at best charcoal grill covers.
6. Cheap parts that fix specific annoyances
A replacement damper or handle. On kettles from the major brands these cost very little and are the difference between a grill you can control and one you fight. On no-name grills they usually do not exist, which is the argument our brand guide makes for buying something whose parts are still sold.
A grate lifter, or just long gloves. Adding coals mid-cook on a grill without a hinged grate means lifting hot metal with food on it. A pair of long heat-resistant gloves solves it for a fraction of the cost of a grill with a hinged grate.
Fire bricks. Two of them, stood on edge, are a permanent heat dam, a windbreak inside the bowl and a small amount of thermal mass, all for the price of a coffee.
What not to buy
Cast-iron grate upgrades, first.They are genuinely good — heat retention, better sear marks — and they can cost a serious fraction of a budget grill. Do them after the fire is under control, not before.
Rotisserie kits. Fun, and they cost more than several items here combined. A chicken cooked indirect over a two-zone fire is already excellent.
Grill mats. They prevent the direct contact with hot metal that makes grilled food taste grilled.
Twenty-piece tool sets.Thin tools, a wire brush we would not use, and a case. Buy individually — the honest list is on our starter kit page.
When to stop upgrading
There is a point where modding a cheap grill becomes throwing money at it, and it is worth naming clearly.
Stop if the bowl or firebox has rusted through. A hole below the fire is an uncontrolled air intake and a structural failure. No gasket fixes it.
Stop if the lid cannot be made to sit true.Check alignment first — many barrel grills are simply assembled crooked and can be loosened and reset — but if the shape is wrong, the cooker will never hold a temperature.
Stop when the parts list approaches the price of a better grill. Cast-iron grates plus a lid thermometer plus baskets plus a cover, on a grill that is already two seasons old, is most of the way to a 22-inch kettle that needs none of them.
The upgrades on this page are worth making to a sound cheap grill, and several of them (thermometer, chunks, gloves, cover) move with you to the next one anyway. That is the test: buy the things that make any grill better, and be skeptical of the ones that only patch this particular one.