Coal & Char

How to Season a New Charcoal Grill

Half an hour of empty fire and a paper towel dipped in oil. What seasoning actually achieves, which grates genuinely need it, and the day-one checks nobody does.

By Stephen V.Last updated How we pick

How this is funded:we earn a commission if you buy through our links, at no extra cost to you. It never changes which grill we recommend, and we’ll tell you when we’d skip one. Full disclosure.

“Seasoning” means two different things depending on what your grill is made of, and conflating them is why the advice online is such a mess.

On bare cast-iron grates, seasoning is the real thing: thin layers of oil polymerized by heat into a hard, slick, rust-resistant coating, exactly as on a cast-iron pan. It genuinely matters, and it builds over the first few cooks.

On porcelain-enameled grates— what most kettles ship with — nothing permanently bonds to glass. Here “seasoning” is really a burn-off plus the habit of oiling the hot grate before every cook.

Both start with the same step, and it is the one nobody should skip: a hot, empty fire before any food goes near the grill.

Why the burn-off matters

A new grill arrives with things on it you do not want in dinner: packing dust, machining and handling residues, and often a light protective film applied at the factory to stop the metal corroding in a warehouse. None of it is dangerous, and all of it tastes bad.

Half an hour to forty-five minutes of hard, empty fire deals with all of it. Full chimney of charcoal, spread across the grate, both vents open, lid on. You may see or smell something coming off in the first ten minutes; that is the entire point of doing it without food on.

This is also your first proper look at how the grill behaves. Watch whether the lid seats evenly, whether the dampers move without forcing, whether smoke escapes from somewhere it should not. On budget cookers, that last one is worth knowing early — gasket tape is much easier to fit before the grill has a season of grease on it.

Day-one checks people skip

Assemble loose, then tighten. Build the whole thing with every bolt finger-tight, align the panels, and only then go round and tighten. Barrel grills and offsets in particular go together badly if you fully tighten each bolt as you fit it, and a misaligned lid never seals.

Check the dampers.Both should move freely through their full range. If the bottom vent is stiff out of the box, sort it now — that vent is your throttle.

Check the lid seat. Put the lid on and look at the gap all the way round. A kettle should sit evenly in the rim. A barrel will not seal perfectly and that is normal, but a visible daylight gap is a candidate for gasket tape.

Find the model number and keep it.Photograph the label or the box. Grates, dampers, handles and ash catchers are all cheap replaceable parts, and in five years you will want to know exactly which grill you own — a point we make in our brand guide, because parts availability is what decides a grill’s real lifespan.

Oiling: thin, hot, repeated

The mechanism is polymerization: a thin film of oil, heated past its smoke point, changes into a hard varnish-like layer bonded to the metal. Three rules follow from that.

Thin. Wipe on, then wipe most of it off. A visible wet coat will not polymerize; it will go sticky and stay sticky.

High smoke point. Vegetable, canola, grapeseed, sunflower. Olive oil and butter break down too low and leave a gummy residue.

Hot, more than once.One layer is a start. Cast iron wants two or three cycles of oil-and-heat before it behaves, which is why the first few cooks should be fatty — sausages, burgers, chicken thighs, bacon. The fat is doing the same job as the oil.

For porcelain, do the oiling immediately before food goes on, every single time: fold a paper towel, grip it with long tongs, dip in oil, run it along the hot bars. This one habit does more to prevent sticking than any amount of scrubbing.

What not to do

Don’t use soap on cast iron. It strips the coating you are building. Scrape, wipe, oil, done. Soap on the bowl and lid once, on day one, is fine.

Don’t scrub the inside of the lid. That black flaky layer that appears after a few cooks is polymerized smoke and it is doing nothing harmful. Brushing it off just starts it over. Deal with it once or twice a season, as our cleaning guide describes.

Don’t season with a spray oil while the grill is lit. Aerosol oil near an open fire is a genuinely bad idea. Paper towel and tongs.

Don’t cook fish first. Delicate proteins on a brand-new grate stick, tear and dishearten. Give it three fatty cooks first.

Keeping it

Seasoning is not a one-off. It is maintained by three habits, all of which take seconds.

Brush the grate hot, right after cooking, when residue is carbonized and brittle — with a bristle-free brush, because a wire one can shed into food. Oil the bars before the next cook. And empty the ash every time, because ash holds moisture against steel and moisture is what actually kills grills.

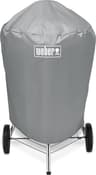
Then cover it. A cover is the cheapest thing on this page and the one that decides whether you are re-seasoning rusty grates next spring or just lighting a chimney — sizing is at best charcoal grill covers.

What we'd actually buy

Seasoning itself costs nothing beyond a spoon of oil and a chimney of charcoal. These three are the items that decide whether the grill still looks like this in five years — and the cover is the one people skip and regret.

Quick picks

Ranked on published specs, beginner-friendliness and value. Select a row to jump to the full write-up. We haven’t cooked on every one of these — here is exactly what we do instead.

#ProductBest forPrice
1
Kingsford Heavy Duty Deluxe Charcoal Chimney Starter

Kingsford Heavy Duty Deluxe Charcoal Chimney Starter

The single accessory that most improves cheap charcoal. Stuff a sheet of newspaper under a chimney of coals, light it, and in about 15 minutes you have evenly lit, ashed-over charcoal with zero lighter-fluid taste — no propane, no chemicals. This large-capacity model lights enough for a full kettle at once. If you buy one thing on this page, buy this.

You need one for the burn-off
$13.80 · View on Amazon

$15.9914% off

Price as of September 8, 2026. #ad How we’re funded

2
Weber 22" Charcoal Kettle Grill Cover (7176)

Weber 22" Charcoal Kettle Grill Cover (7176)

The cheapest thing you can do to double the life of a charcoal grill. Weber's own 22-inch cover is heavy polyester, UV and water resistant, breathable so trapped damp doesn't rust the bowl from the inside, and it has straps that keep it on the grill in wind. Twenty dollars against a grill you'd otherwise replace years early is the best math on this site.

Buy it the same day
$19.99 · View on Amazon

$21.999% off

Price as of September 8, 2026. #ad How we’re funded

3
TNTOR Bristle-Free Grill Brush with Scraper, 18" (sks02)

TNTOR Bristle-Free Grill Brush with Scraper, 18" (sks02)

The cheapest bristle-free brush we'd put near food. A three-layer stainless coil does the scrubbing, a sharpened scraper takes the baked-on carbon, and the detachable 18-inch handle keeps your knuckles a foot and a half from a live charcoal bed. Nothing here can shed a wire into a burger, which is the entire point of the category.

For keeping the coating
$16.99 · View on Amazon

Price as of September 8, 2026. #ad How we’re funded

#1You need one for the burn-off

Kingsford Heavy Duty Deluxe Charcoal Chimney Starter

The single accessory that most improves cheap charcoal. Stuff a sheet of newspaper under a chimney of coals, light it, and in about 15 minutes you have evenly lit, ashed-over charcoal with zero lighter-fluid taste — no propane, no chemicals. This large-capacity model lights enough for a full kettle at once. If you buy one thing on this page, buy this.

What’s good

  • Lights a full grill's worth of coals in ~15 minutes, evenly
  • No lighter fluid — no chemical taste in your food
  • Large capacity and heavy-gauge steel for the low price

Trade-offs

  • You need a scrap of paper or a fire starter to light it
  • The steel gets very hot — always use a glove
TypeChimney starter (large capacity)
MaterialZinc-coated steel
Lights~15 minutes to ashed-over coals
Best forLighting charcoal without fluid

Specs read from the product listing, on July 21, 2026. “Not published” means the maker doesn’t state that figure there.

#2Buy it the same day

Weber 22" Charcoal Kettle Grill Cover (7176)

The cheapest thing you can do to double the life of a charcoal grill. Weber's own 22-inch cover is heavy polyester, UV and water resistant, breathable so trapped damp doesn't rust the bowl from the inside, and it has straps that keep it on the grill in wind. Twenty dollars against a grill you'd otherwise replace years early is the best math on this site.

What’s good

  • Made by Weber for the 22-inch kettle — no guessing at the fit
  • Breathable fabric: water resistant without trapping damp against the steel
  • Fastening straps stop it blowing off in wind
  • 2-year warranty stated on the listing

Trade-offs

  • Costs about double a generic cover of the same size
  • Water resistant rather than fully waterproof
TypeKettle grill cover
Fits22-inch charcoal kettle grills
MaterialHeavy-duty polyester, UV and water resistant
Warranty2 years (per listing)

Specs read from the product listing, on August 11, 2026. “Not published” means the maker doesn’t state that figure there.

#3For keeping the coating

TNTOR Bristle-Free Grill Brush with Scraper, 18" (sks02)

The cheapest bristle-free brush we'd put near food. A three-layer stainless coil does the scrubbing, a sharpened scraper takes the baked-on carbon, and the detachable 18-inch handle keeps your knuckles a foot and a half from a live charcoal bed. Nothing here can shed a wire into a burger, which is the entire point of the category.

What’s good

  • No wire bristles at all — nothing to shed into food
  • Detachable 18-inch handle, so it stores flat and hangs on a hook
  • Built-in scraper handles the carbon a coil alone won't shift
  • Listed as safe for porcelain, ceramic and cast-iron grates

Trade-offs

  • Coil brushes need a hot grate to work — on a cold one they skate
  • The handle is plastic; keep it out of direct flame
  • Budget build: expect a season or two, not a decade
TypeBristle-free coil brush + scraper
Length18 in (detachable handle)
HeadThree-layer stainless steel coil
Grate typesPorcelain, ceramic, cast iron, stainless, infrared

Specs read from the product listing, on August 18, 2026. “Not published” means the maker doesn’t state that figure there.

Frequently asked questions

Do you actually need to season a new charcoal grill?

You need to burn it off, and you should oil the grates. The burn-off drives away manufacturing residues and any protective film from the factory, so the first food doesn't taste of them. Oiling the grates builds a non-stick coating and, on bare cast iron, is the difference between grates that last and grates that rust.

How long should you burn off a new grill?

A full chimney of charcoal with both vents open and the lid on, running for 30 to 45 minutes. You're aiming for a properly hot fire rather than a specific number — hot enough that anything that can burn off, does. Empty grill, no food, and stay nearby.

What oil should you use to season grill grates?

Any neutral oil with a high smoke point — vegetable, canola, grapeseed or sunflower. Avoid olive oil and butter: they smoke and break down at lower temperatures and leave a sticky film rather than a hard coating. Apply thinly; a heavy coat goes gummy instead of polymerizing.

Do porcelain-enameled grates need seasoning?

Not in the cast-iron sense — porcelain is glass, and nothing bonds to it permanently. What it does need is a wipe of oil on the hot grate immediately before food goes on, every time. That's what stops sticking. Treat oiling porcelain as a per-cook habit, not a one-off ritual.

Can you wash a new grill with soap?

The bowl and lid, yes, once, to get rid of packing dust — then dry it thoroughly. Bare cast-iron grates are the exception: soap strips the coating you're trying to build. Scrape those, wipe them, oil them, and let heat do the sanitizing.

How do you re-season grates that have gone rusty?

Scrub the rust off with a bristle-free scraper or a ball of foil, wash and dry the grate completely, coat it thinly with high-smoke-point oil and run it through a hot empty fire for 30 minutes. Repeat the oil-and-heat cycle two or three times. Deeply pitted grates are cheaper to replace than to rescue.

Sources

  • USDA FSIS — Grilling Food SafelyUSDA on safe handling at the grill, using a food thermometer, and the difference between grilling and slower cooking (accessed July 21, 2026)

Keep reading