An offset smoker is the only cooker on this site that can genuinely be described as a skill. A bullet smoker holds its temperature almost by itself; a kettle running the snake method does too. An offset asks you to build and maintain a fire for hours, and it rewards you by producing the barbecue that competition cooks make.
The good news is that the skill is small. There are four things to understand, and once you have them, a cheap offset behaves. Almost everyone who says their offset is “uncontrollable” is running into one of the four.
1. Small fire, plenty of air
The instinct is to build a big fire and then choke it down with the vents to hold a low temperature. That is exactly backwards, and it is the single most common mistake.
A choked fire is an oxygen-starved fire. It smolders, and smoldering wood produces the thick white smoke that makes food taste like an ashtray. What you want is a small fire burning cleanly with plenty of air— a modest bed of coals with one or two chunks of wood on top, intake open, chimney wide open, producing a thin blue haze you can barely see.
If the chamber is too hot, use less fuel next time rather than closing everything down. If it is too cool, add fuel and open the intake — never restrict the chimney, which is the exhaust for exactly the compounds you do not want settling on the meat.
Getting air under the fire matters too. A fire sitting on the flat floor of a firebox is half-smothered by its own ash. Most budget offsets ship with a basic charcoal grate; if yours does not, a basket or riser is a cheap and worthwhile addition.
2. Seal what leaks
On thin-steel cookers — the budget verticals, the combo barrels, most offsets under a few hundred dollars — the lid and the firebox joint leak. Every leak is an air intake you did not choose, and a cooker with unplanned intakes cannot be controlled with the vents.
High-temperature fiberglass gasket tape, the sort sold for wood-stove doors, is inexpensive and takes an hour to fit around the lid lip and the firebox seam. It is the highest-return hour you will spend on a budget offset. Fuel use drops, temperature swings shrink, and the intake vent starts doing what it is supposed to do.
The one place you should not chase a perfect seal is the chimney. It is meant to be open.
3. Measure at the grate, not the lid
Factory dial thermometers sit in the lid and read the air at the top of the dome, which on an offset can be a long way — in both distance and degrees — from the air surrounding your brisket. Many are also simply inaccurate.
Put a probe at grate level, next to the food, at the end of the chamber where the food is sitting. A dual-probe unit gives you pit temperature and meat temperature at once, which is the entire dashboard for an offset cook. The USDA is unambiguous that a thermometer is the only reliable way to know food is safe, and on a long cook it is also the only way to know whether your fire is drifting.
Target 225 to 275°F in the chamber. That is the band USDA guidance recommends for smoking meat and poultry, and it is where collagen breaks down without the fire drying the surface out.
4. Work with the gradient, don't fight it
Heat enters at the firebox end and leaves at the chimney. The end nearest the fire will always run hotter. Expensive reverse-flow cookers — like the Longhorn— reduce this by running heat under a steel baffle to the far end first, then back over the food. Everything cheaper simply has a hot end.
Use it. The thickest, most heat-tolerant cut goes nearest the firebox; ribs and poultry go toward the chimney. At the halfway point, rotate everything end for end. A water pan in the middle of the chamber evens things out further by adding thermal mass and humidity.
Charcoal, wood, or both?
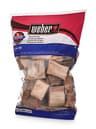
On a budget offset, use charcoal for heat and wood for flavor. Charcoal burns predictably and gives you a stable base; a couple of fist-sized wood chunks on top of the coals provide all the smoke a piece of meat can absorb. Our smoking fuel guide covers which charcoal holds a long burn and which wood suits which meat.
Pure stick-burning — running the cooker on split logs alone, the traditional Texas method — is genuinely better in a heavy cooker with thick walls, because the mass smooths out the peaks each new split produces. On thin steel, every split is a temperature spike. Learn the cooker on charcoal-plus-chunks first; move to splits if and when you upgrade.
One rule regardless: meat stops taking on smoke fairly early in the cook. Piling on wood for hour six adds bitterness, not flavor. Two or three chunks over the first couple of hours is plenty for most cooks.
A realistic first cook
Do not start with a brisket. Start with chicken thighs or a pork shoulder. Thighs are forgiving, cook in a couple of hours and teach you the fire cycle without a twelve-hour commitment. A shoulder is almost impossible to ruin: it is fatty, it tolerates temperature swings, and it is delicious even when the cook has been untidy.
Run the cooker for half an hour before the food goes on, with wood already burning clean. Keep a written note of vent positions and what the temperature did — the second cook on the same cooker is dramatically easier than the first, and the notes are why.
Then, when the fire is steady and the food is on, the actual point of an offset becomes obvious. You are outside for an afternoon with something to tend to. That is either the best part of the hobby or the reason to buy a bullet smokerinstead — and both answers are legitimate.